I was racking my brain for something I could do for the $10 fundraiser table at the upcoming silent auction benefiting my kids’ public school, which has been hit pretty severely by budget cuts this year. The idea behind the table is to replace the ‘buy it now’ table we had last year with a bunch of items that could all be sold for the same price: $10. Since a lot of the items on that table were handcrafts like knit hats, scarfs, etc., I thought maybe I could do something (though I don’t yet know how to knit).
But as I was doing Rose’s hair the other day, inspiration struck. Grandma Vickie had bought Rose some cute little hair gadgets at a fundraiser, and I realized I could make them myself. And since they used small amounts of fabric, I could basically just use scraps from past projects to assemble them, so they were really low cost, just the elastic hair bands! I think we are going to sell them three pairs for $10, so the goal was to do at least 60 of the individual gadgets.
Super easy, and illustrated in the photo here: first, cut out circles of fabric. I used a cottage cheese lid as my pattern. Then, do a simple in and out stitch around the outside of the circle. Pull to gather, and voila!
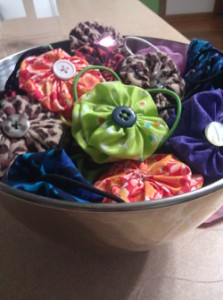
You can just knot the gathered thread, stitch an elastic hair band to the other side, and be done with it, but on some of mine I thought it would be cute to add a button for some contrast and/or bling (depending on the button and the fabric). So you can stitch that on during the band-attaching process. I can think of a lot of other cute ideas to play off this – my mom just suggested jingle bells with Christmas patterns – that could be adorable!
But the key to the whole process was inviting some friends over (thanks, Kate, mom, and Glory!) and spreading the labor out a little bit. I had almost all the circles cut before they got there, but the four of us worked for three or four hours and made almost 100 individual gadgets, fifty pairs! I finished up the last of the circles today and as my mom is still coming up with ideas, this might not be over… but this is a great start for the fundraiser, since I only invested $5 for 100 hair elastics. It would have cost me more to make a couple of pans of brownies, and this is going to make way more money for the school!
 Â Now just to figure out how to display them all on the table – I don’t want to leave them in the mixing bowl!
 Now just to figure out how to display them all on the table – I don’t want to leave them in the mixing bowl!


